introduction
Reverse engineering is a process in which you take an object apart and analyze it to see how it works. Reverse engineering can be used for documentation or for research, but in this case, it is used to improve an existing product. In this case, reverse engineering is used to innovate the T9 Automoblox Truck. In order for me and my partner to come up with the possible Automoblox enhancements, we first had to go through the process of reverse engineering.
VISUAL ANALYSIS
VISUAL ANALYSIS
The first stage in reverse engineering is the visual analysis. In this step, one must analyze the object only upon the visual appearance of it. This step helps someone understand what is appealing about the product, and what is not. Is the brightness of a color not enough or too much? Does everything look proportional? Is the pattern appealing?
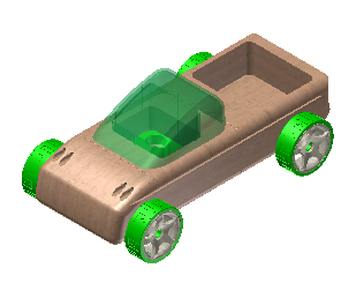
In this case, I found that the focus of the truck mainly goes to the wheels, because of the bright green color and the way it is emphasized by the other colors of the truck. The truck also shows an economy design, meaning that there is not a lot going on, and the not many elements/principles of design are used here. This stage of reverse engineering allowed me to see that the T9 Truck is "boring", and there can be a lot of solutions to fix it.
In this case, I found that the focus of the truck mainly goes to the wheels, because of the bright green color and the way it is emphasized by the other colors of the truck. The truck also shows an economy design, meaning that there is not a lot going on, and the not many elements/principles of design are used here. This stage of reverse engineering allowed me to see that the T9 Truck is "boring", and there can be a lot of solutions to fix it.
FUNCTIONAL ANALYSIS
The second stage of reverse engineering is the functional analysis. A functional analysis shows the different functions of an object. It shows why different parts are vital to the entire object. If one part wasn't present, the functional analysis what would be different about the invention. In this case, every individual part fits smoothly into another, and without every part, the truck would not be the same. If the windshield was missing, there would be no protection for the inside of the passenger section. If one wheel was missing, the truck would not be able to move from place to place.
STRUCTURAL ANALYSIS
STRUCTURAL ANALYSIS

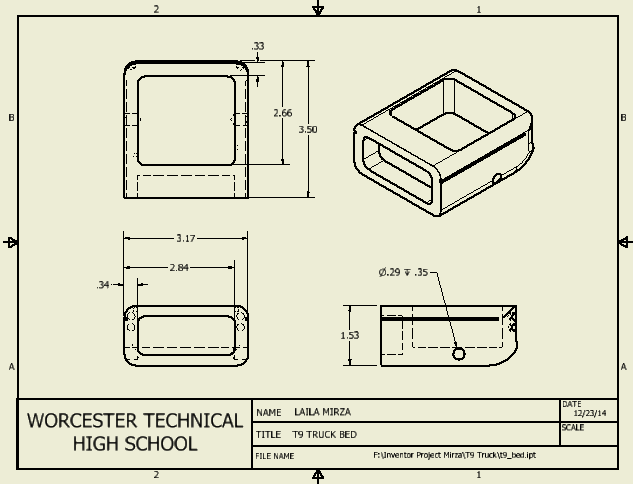
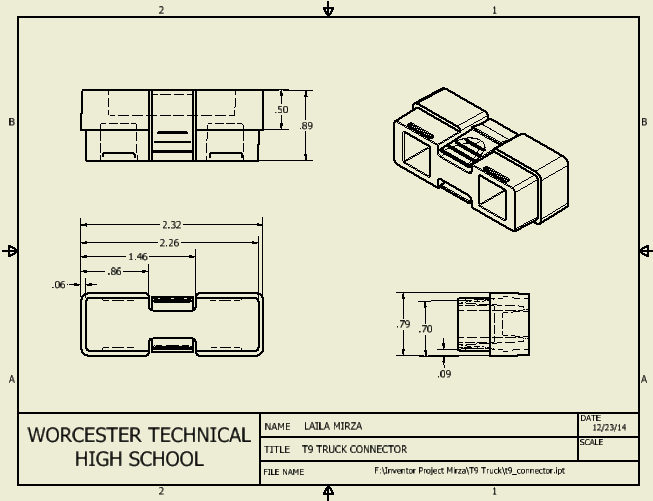
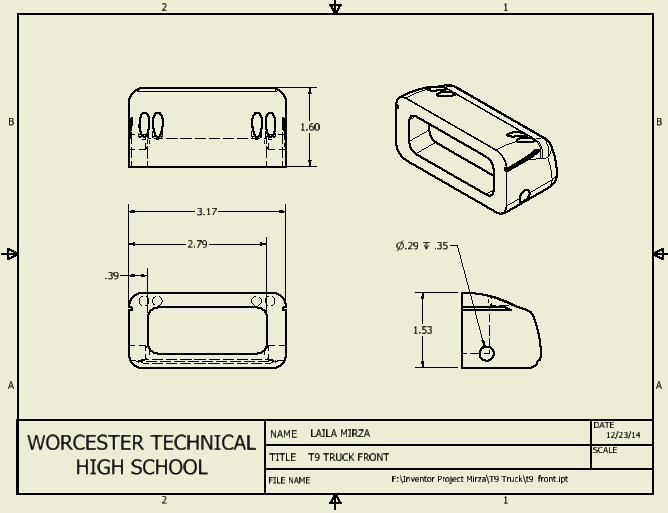
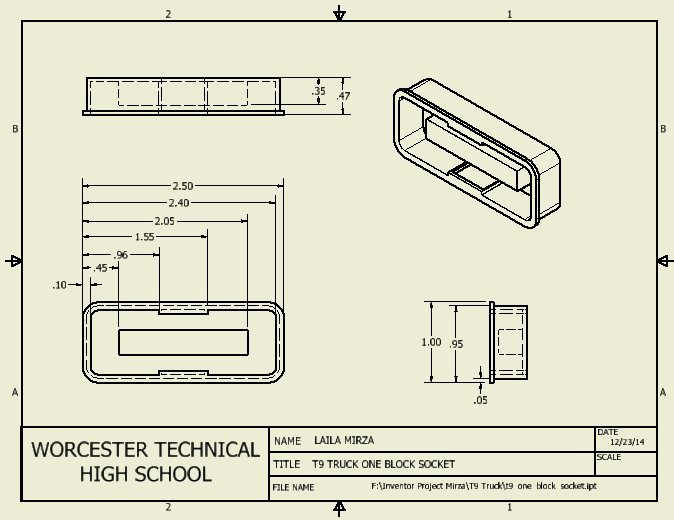
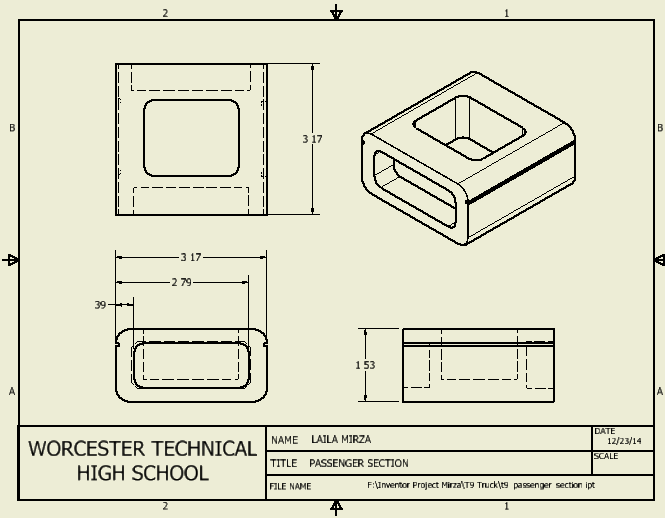
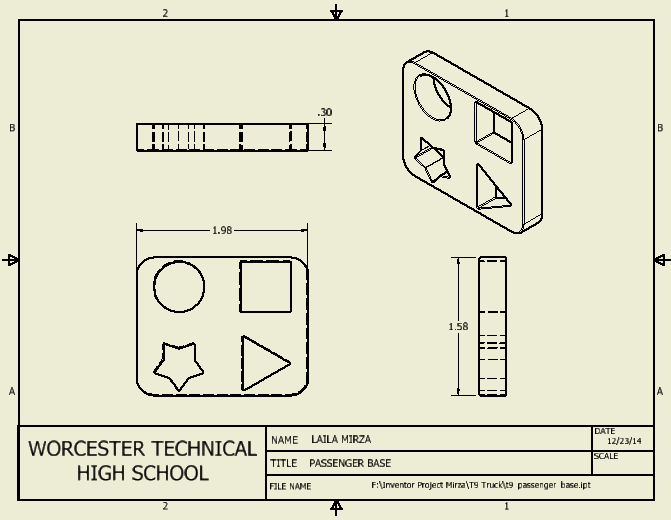
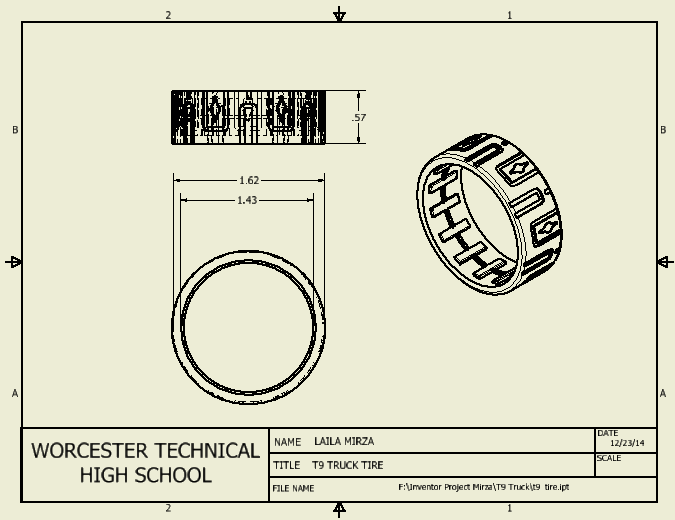
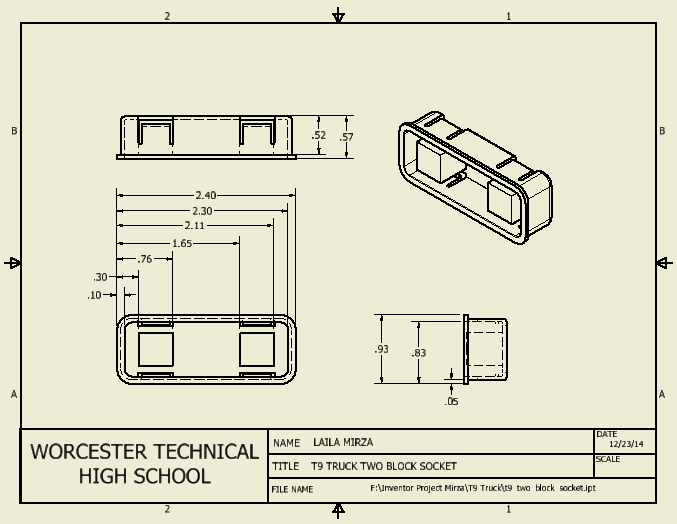
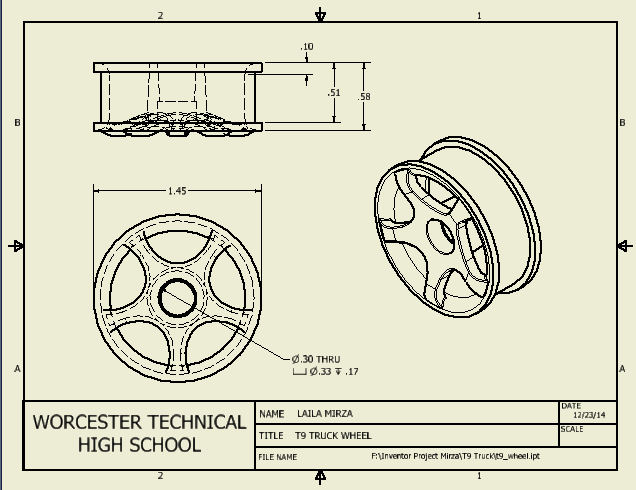

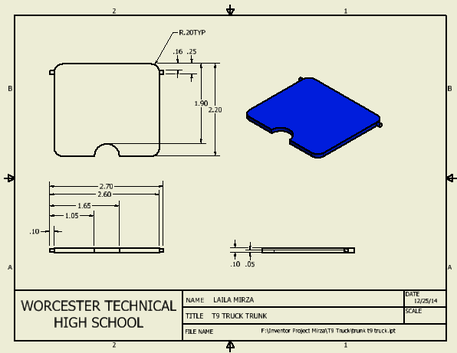
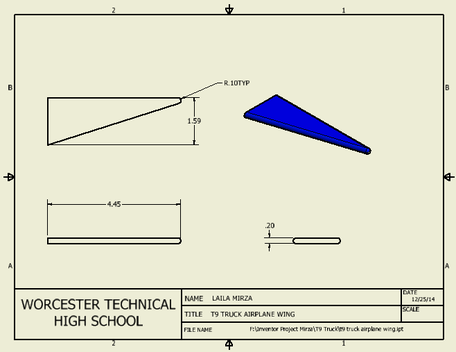
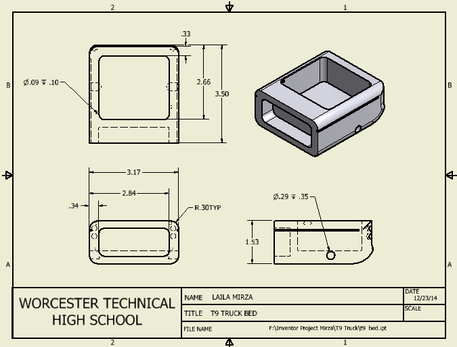
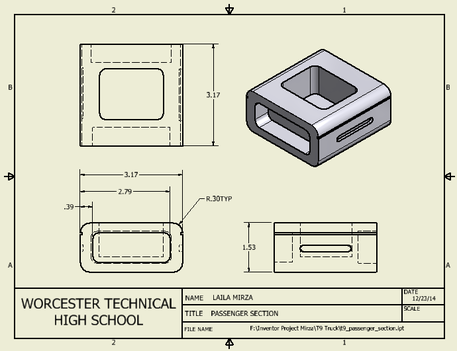
The third and final step of reverse engineering is the structural analysis. In this step, each part is examined individually. This is so the engineer can get a sense of each part as an independent and not a part of the truck. Measurements and dimensions are taken. (Sometimes, only the basic dimensions are needed. In this situation, I only worried about the basic dimensions in some parts. )Each part is analyzed in order to understand it. In this case, all 11 parts that make up the T9 Truck are dimensioned. (Above are the multi views of each part. I apologize that some of the measurements are cut off.)
Now that the reverse engineering process is over, the design process can start.
Now that the reverse engineering process is over, the design process can start.
define a problem
GROUP NORMS
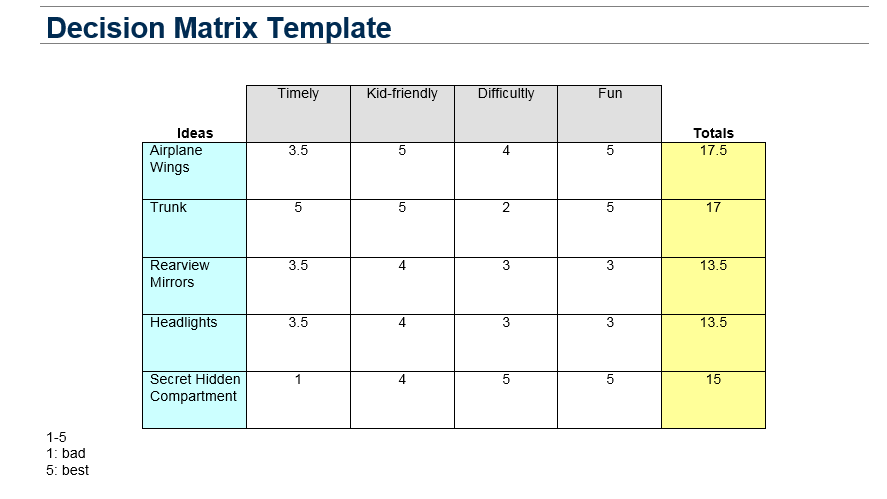
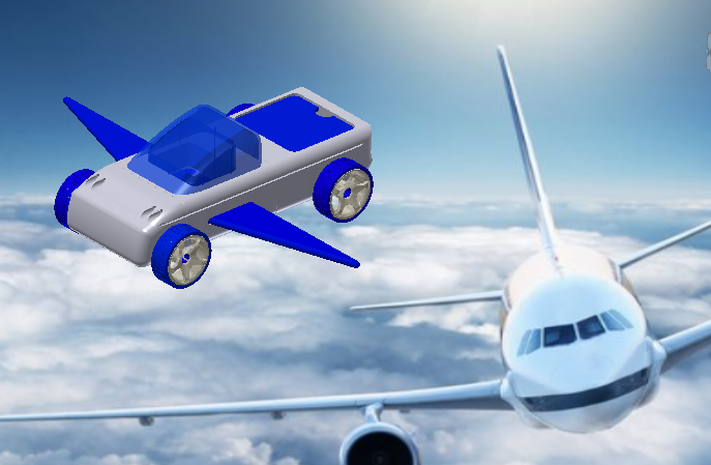
Before winter break began, my partner, David, and I talked about how we were going to approach this project. We exchanged phone numbers and began discussing. We both agreed that we wanted to add a trunk and airplane wings, because we thought that would be the most challenging and the most fun. We agreed that I would do the Inventor part of the project, and David would do the excel part (design brief, brainstorming list, decision matrix etc.). We also agreed that whoever was done first would do the weebly.
(Below is our gantt chart.)

generate concepts

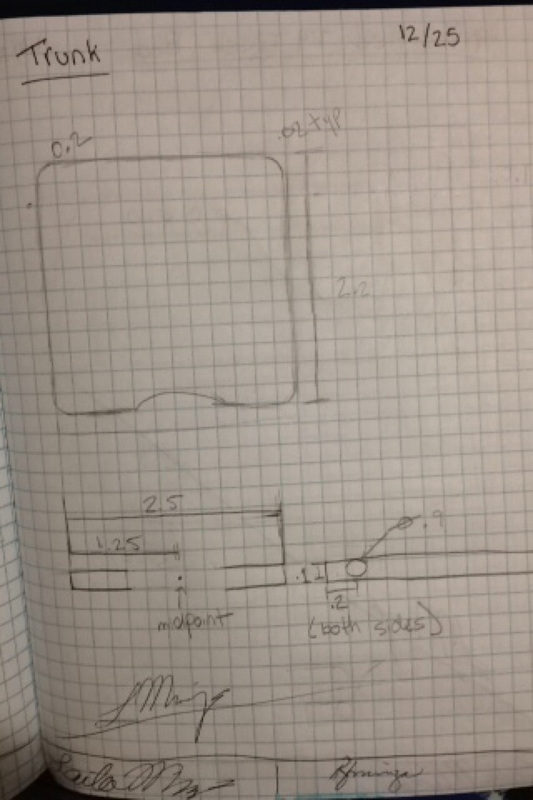
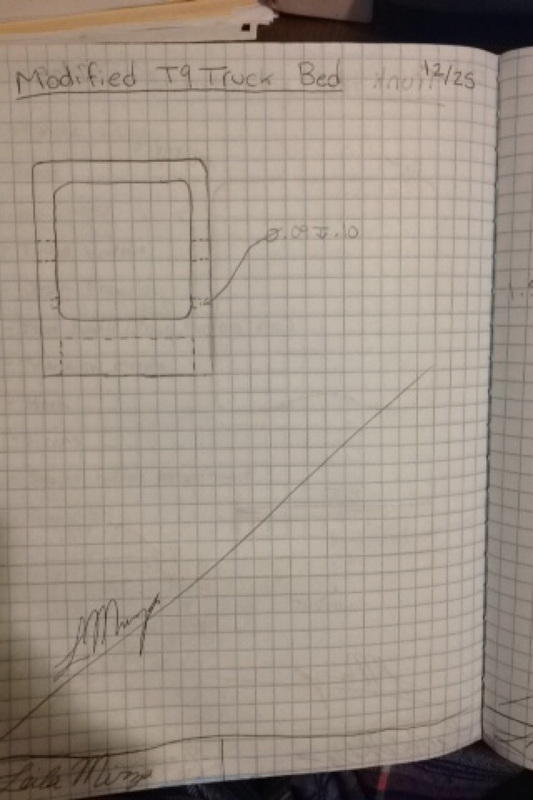
Below are my sketches of my enhancements
|
|
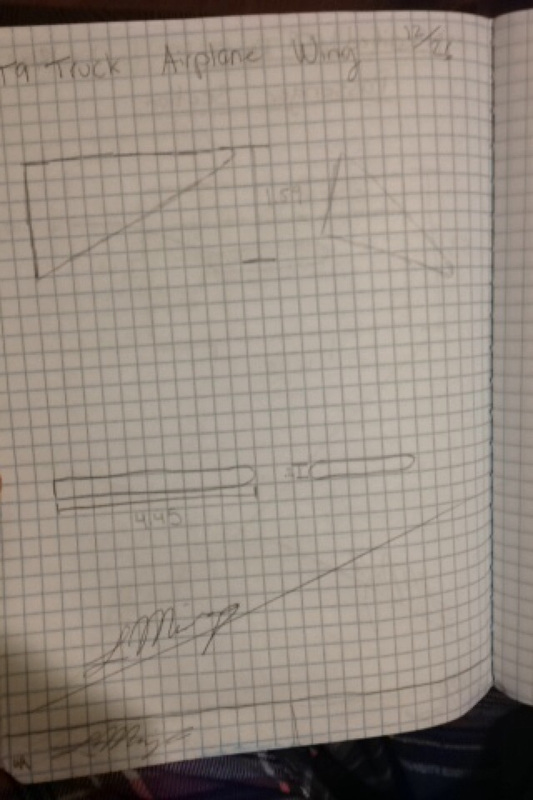
|

|
develop a solution
|
|
construct and test a prototype

evaluate the solution
I showed my before and after pictures to my mom, and I asked her what she thought of it.
"Sleek."
I then asked her if there were any changes or suggestions that she had for me.
"No. I like it a lot!"
I then asked my friend Tyler:
"Sleek."
I then asked her if there were any changes or suggestions that she had for me.
"No. I like it a lot!"
I then asked my friend Tyler:
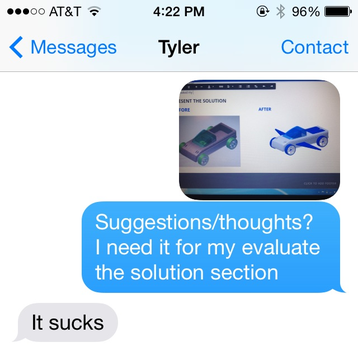
He then said that he liked that color change. But he suggested that I change the gray color, because it was a little boring.
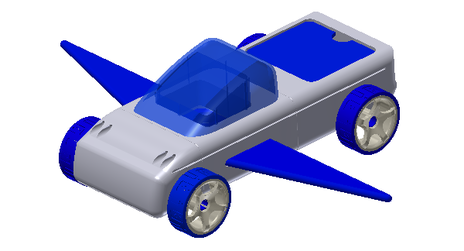
present the solution
This project was my favorite one so far. It was fun trying to innovate a product because you have a base, and you can do whatever you want to enhance it. There are some constraints that you have to follow, but that helps you narrow down your options. This project also helped me understand Autodesk Inventor a little bit better. It gave me some practice when assembling a product on the program.
I am also very proud of the final product. I feel that I innovated the truck so it is more engaging and it will be more fun for kids. (My target audience is young boys.)
I am also very proud of the final product. I feel that I innovated the truck so it is more engaging and it will be more fun for kids. (My target audience is young boys.)
BEFORE |
AFTER
|
|
|
1. When changing or enhancing a product, the engineer should consider a couple of factors. For example, the engineer should make sure that the target audience for the product will be happy with it. If the product does not please the target audience, then it was innovated too much (or not enough). He/She should also consider different constraints, like how expensive the product should be, how long it takes to make, and is it worth building. (Does it bring in money or not.)
2. It is important to document the brainstorming process because, especially when innovating a product, it is a very important step. If one innovation idea does not work, it is good to look back on your work and see what other options there could be. Some of these options may be crazy, but not impossible. When brainstorming, you want to write down all of your ideas, good or bad. Because later on, you can build off an idea and it could improve the product.
3. By sketching yours ideas, you are giving yourself a visual idea of what the part can look like. Most times, it helps having a visual idea of a product, even if there aren't dimensions on it. Jørn Utzon was the architect of the Sydney Opera House, and the only sketch that he submitted to the committee was a rough sketch of what he thought the Opera House could look like. It was only one view, and some lines. No dimensions, just curved lines, and looked how his project turned out.
